Friday 31 March 2023

Its new Challenge day...


Good Friday Morning Ladies, 

I hope today finds you well, can you believe its the last day of March today?!  Another month has flown by so fast,  it barely seems a couple weeks since we were welcoming March in!  From here on in the garden gets more and more beautiful as everything starts to wake up.  I do think that the April showers have started early though! 

Our Next Challenge 

I had to make a Masuline card yesterday and I really struggled,  it was trying to choose which style to go with,  Lucy had asked me to make a card for Flynn's mum's partners 60th Birthday, No pressure!!  I did eventually finish a card for him at after 10pm!!  The funny thing was Sue had to make a 60th Birthday card for Chris too, we found a design that she liked too. 

With all that in mind I think we could all do with some practice!!  I am not going to say specifically 'Masculine ' cards,  I am going to suggest that we make cards that  would 'Work' for men too.

I am looking forward to this challenge.

I hope that you all have a fantastic Friday,

Love & hugs to all of you,

Sandra                                                                    xxxxxx 


Thursday 30 March 2023

Simple background:Watercolour


Good Morning Ladies, 

I hope today finds you well, we had a wet and chilly day yesterday and more rain forecast today, the highlight of the day was hearing the birds joyful singing between showers 🐦  

Now if any of you had a rough day yesterday I'm about to make yoymu feel better.....   

I got up and decided to shower, condition my hair, then use a pretty smelling moisturiser,  make myself feel brighter than the day looked!  So I did, I had to have a little relax before drying my hair, I felt good, so I thought lets keep this good feeling going with a nice healthy lunch,  tuna salad with pickled red cabbage and beetroot, I'm not a huge tuna fan, to me it smells like cat food,  but I know its good for my heart.  So I prep all the salad, then I get to opening the Tuna, I lift the pull tab on the lid then hold it over the sink and gently press to drain the water out, or I 'thought' i was gentle...... all of a sudden there is an audible click and it seemed like the whole tin exploded, covering me from 'Newly washed & conditioned head to the tips of my fluffy slippers in slimey, sloppy tuna 🐟 fish, 😳😲🤢  It had soaked through my clean t shirt to my bra, everything was covered!  I could have wept had it not been for the hysterical laughter behind me, for a few minutes I was like the pied piper, the cats wouldn't leave me alone !!!  So all clothes in washing machine,  me back in the shower, I can still smell tuna on my arm though 😪!  

Now onto my card.... I am happy to admit that I have a problem with 'abstract ' or deliberately messy cards, to me there is a fine line between too little and too messy, I love the look of these style cards on Pinterest so I treated my myself to a new stamp that would work for many different card styles, because like all of you the thousands of stamps that I already have weren't right.


So I decided to go with a watercolour background, I got out a set of watercolour paints I've had for over a year and not touched 


I bought these 'Koh I Noor' stackable watercolour paints ages ago, it was the Chocolate Baroque woman selling them on C&C.  To be fair they do have quite decent pigment.  They were on a special deal for £10.                                                                       Back to my card, I used a piece of acetate to transfer 'smooshed ' paint onto a piece of watercolour card that I had spritzed with water, building up the colours and I also tapped the brush a few times to give some splatters.  I popped it on the Aga to dry, I placed the dried piece into my stamping platform (incase I needed to restamp onto the rough textured watercolour card) I stamped using Versafine clair.  To finish I mounted onto black card, then onto a white card base.  A simple sentiment finishes the card. 

I hope that you all have a lovely Thursday,  I am staying well away from Tuna today. 

Love and hugs to all of you,

Sandra                                                                      xxxxxx 


Wednesday 29 March 2023

Another Splatter Background card


Good Wednesday Morning Ladies, 

I hope today finds you all well,  yesterday was a lot cooler than the last couple days have been, I am also grateful that I didn't leave the washing until yesterday as it certainly wouldn't have dried!  

Today's card was made using another of the splatter backgrounds I made last week....


I wanted to show as much of that fun background as possible, so I just stamped and embossed a Spellbinders Sentiment in gold, and die cut , I added a black drop shadow to make the sentiment stand out more. I felt that it needed something else to pick out the colours,  so I die cut some flowers  to show the colours off more. Super simple but fun !! 

I hope that you all have a fabulous Wednesday, 

Love & Hugs to all of you, 

Sandra                                                                    xxxxxx 


Tuesday 28 March 2023

Simple watercolour background


Good Morning Ladies, 

A chilly but beautiful day yesterday, we got a line full of towels dry, luckily I popped into our bedroom and smelt an awful farm smell, I think they burn straw from stables,  so Paul managed to get towels in before they took on the awful smell, 10 minutes in tumble dryer to restore their fluffiness!  It really is the simple things that bring me joy! ☺️

Paul is going into the office today and my usual Tuesday companion (Lucy) is staying st Becca's to dog sit Benji, so it will be a quiet day here,  I will be in my craft room keeping busy. 

Today's card was a super quick card, the inspiration was from the Creative Stamping magazine from February,  their's was a piece to put in a frame,  I just wanted a card.  This could just as easby be a Journal page or scale butterfly down and would make a perfect Thrinchie.

I used my Zig watercolour pens to colour the butterfly that I had stamped with Versafine Clair, I took the green that I used on the butterfly,  scribbled some colour out on my glass mat and spritzed with water, I then took a piece of watercolour card cut to 3 3/4  X 5 3/4 inches and dipped it in my ink, I dried it and dipped again until I got the desired coverage.  I did add some of the violet pen splatters to the background but they don't show up on camera.  I stamped some leaves from the free stamp set and coloured them with same green pen and fussy cut.  
To assemble the card I adhered my watercolour background to a mat of purple card and then onto a white card base, measuring 6 × 4 inch.  I added glue to the centre of the butterfly and adhered to the background and then arranged the leaves around his wings. A few subtle purple gems finish the card. 

I hope that you all have a fantastic Tuesday, 

Maria I hope the Sun stays out for your return, 

Love and hugs to all of you,

Sandra
xxxxxx

Monday 27 March 2023

A new Technique- Print Making with Die Cuts


Good Morning Ladies, 

I hope that you all had a good weekend,  we had a dry day, quite breezy, it kept threatening to rain but thankfully it held off.  We managed to get out in the garden for an hour, I was shocked at how quickly I became exhausted though, compared to last year.  I ended up giving up and coming inside leaving Paul to finish off, it's probably the effects of the prolonged courses of antibiotics, so frustrating though, hopefully doing little and often will help build my stamina back up.  

I am so excited to tell you about this new (to me) technique.  It's called Print Making from die cuts.

I basically die cut a Tim Holtz Wildflower from watercolour card and coloured it with my watercolour pen.


But the trick is to colour it on another piece of watercolour card that you have spritzed with water, you then turn the coloured flower over and press it onto the watercolour card to transfer more of that ink, I spritzed again with a little more water and this was my background....


It doesn't look that exciting,  but you could die cut this down or just use as is as the perfect colour matched background.  I decided after some pinterest research to die cut mine to create a frame to showcase my flower on.  


I added everything to a DL card and added a copper embossed sentiment,  I really love how this turned out and will definitely do it again.

I hope you like this technique and are tempted to have a go, it's so simple.  

Have a lovely Monday my lovelies, 

Love and hugs to all of you,

Sandra                                                                    xxxxxx 

Sunday 26 March 2023

Your Simple Background Challenge projects


Good Sunday Morning Ladies, 

We had a long day yesterday,  the weather was bright for the most part, Adam and Becca were sat relaxing having breakfast before we managed to get off the M25 !  They had a 7hr flight to Dubai, a long lay over then a 9 hr flight to Bali, I made sure to remind Becca that she had to get up every hour to keep her knee from swelling too much. I don't know how she managed to carry that Backpack but she did ok.  They should arrive this evening,  she is going to message me. 

Your Challenge Projects 

Sonia


Sonia's Description:

Card 1:  For this card I was inspired by Amanda Branston who demonstrates for Lavinia Stamps. I used a selection of stamps, stamping with distress inks. I then spritzed with water to get a watercolour effect. The dandelions were stamped after but not spritzed. I added some little dots of gilding flakes. The sentiment is part of a larger inkylicious stamp.

Card 2:  I inked up a grid stamp with distress inks and spritzed with water before stamping. I doubled up on Tim Holtz butterfly and added sentiment, again from a larger inkylicious stamp.

Wow Sonia, 2 amazing cards, I love your backgrounds, your first card looks so 'arty' you could frame that and have it as wall art!  Thank you so much for taking part my lovely XXX 


Karen


Karen's Description:

Thrinchie 1:    A simple background using JL embossing folder I’m cheating and using it as part of the Thrinchie challenge - clocks.  
Here’s the finished piece  .......
A Thrinchie from Tracy Evans’ challenge I wanted to try monochrome(ish)
I used a John Lockwood EF and swiped the card with Speckled Egg DO - simple background 
I stamped #566 twice Triple embossed the clock I used the sentiment “Fragile” from same set as to me time is very fragile I used a 3B pencil and paper stump for shading which I really enjoyed doing

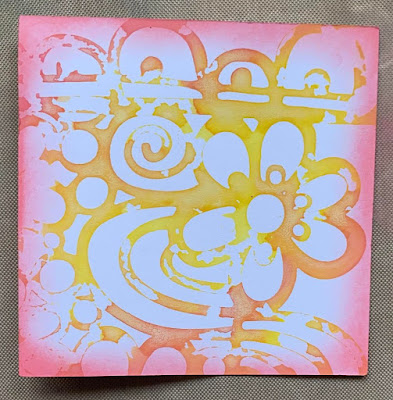
Thrinchie 2:  Here’s a simple background that I created using Mustard Seed and Worn Lipstick DO on a stencil which I then spritzed with water.  Kat leant me stamp with quirky critters on so I used that  to create Quirky Thrinchie 

Oh Karen I love both of your Thrinchies, that JL clock E Folder has an incredible deep, crisp emboss, I love the colour you have used to brush over it.  A perfect background to your clock Thrinchie.  The colours you chose for the background of your Quirky Thrinchie work so well with those beautifully coloured characters the shading on the blue one is incredible. Thank you so much for two very inspirational Thrinchies XXX 


Lilian 


Lilian's Description:

Here is my card for this week. Unknown embossing folder, dies are Stampin up Poppy moments, old ink pad called Kaleido colour, rainbow raised dye in pad, called autumn leaves.   

Such a gorgeous rich colour on those flowers Lilian, that embossing folder is so pretty and works well with the flowers position.  The flowers look like they have a sparkle to them too.  Thank you so much for taking part,  I imagine you have been exhausted this week after having a busy weekend with family XXX    

Maria


Maria's Description:

Card 1. I used a stencil, think it is by C. expressions and coloured with Distress Inks. Heat embossed the HB twice and then used a Butterfly I had in my stash.

Card 2. Here I used three colours of Metallic Water Colours.    Stamped the Owl by Crafty Individuals in black and a Happy Birthday.

Card 3. Here I first used two colours Distress Inks and the used a Butterfly also by Crafty Individuals. Die cut around and a few crystals from my stash finished the card off.

OMG!  Maria, your cards are so amazing!!  I love the bright vibrant colours of your first card and that amazing crisp clean finish you have acheived with your stencil.  
That owl is so majestic, I love the metallic watercolour wash behind him and the splatters finish the card off perfectly. 

I really love this mixed media Butterfly stamp Maria, the colours you have used really add to the mixed media style,  that die you have used to cut it out is so delicate and the sentiment works so well with image.  

Thank you so very much for making three amazing,  inspirational cards my lovely,  I really appreciate you supporting the challenge,  have a lovely time in Amsterdam XXX

Sue

Sue's Description:


Sue what an amazing effect, your card is amazing   I like the idea of having the sentiment in place of the body of the butterfly.  You must be so pleased with the result.  Thank you so much for taking part my lovely XXX 


**************************

Ladies what a wonderful, colourful display of cards we have produced this week,  you are all so amazing and I really appreciate your support ❤

I hope that you a have a lovely restful Sunday,

Love & hugs to all of you,

Sandra                                                                    xxxxxx 

Saturday 25 March 2023

Mixed Up Saturday


Good Saturday Morning Ladies, 

Its a lovely bright morning although there are some rather large dark clouds around, boy did we have a windy night!  

We have an early start to our day as we have to take Becca & Adam to Gatwick they need to be there before 9am ! 

Diecutting Essentials issue 101


A Hunkydory Moonstone Striplet style die with a Border die is what makes up the free gift for this issue 


Thus first feature shares some lovely inspiration,  I really like some of the different card folds that have been used.


Take some white card and Distress inks and create yourself some beautifully coloured flowers that you can make to match your project. 


Back to Basics: 

Trying something different with your Circle dies, to create some funky designs, great for mens cards. 


Some ideas for using up the waste from die-cutting, or for using up your bit box.  Basically cutting the card pieces into tiny strips to create a pattern.  I must admit I wouldn't have thought about embossing the scrap pieces after arranging them. 


Some more inspiration for the free dies, this time we have some gift wrapping ideas too.


This feature shares some different ways of creating Shaker cards. 


Finally some more inspiration for your free dies, using different ideas like using die cut as a stencil etc. 

All in a there are some good techniques in this months magazine,  I'm not sure that I will use the free die though, it's very similar to striplets by SW which I have but don't really think to use anymore! 
I hope the review gives you some inspiration! 


This is Lucy's Welcome Home Banner that she made on Scan & cut for Flynn, I love how she added the Anchors to give it a personal touch. 


Ladies I hope the sun is shining on you wherever you are today, I hope you have an amazing day 

Love and hugs to all of you, 

Sandra                                                                    xxxxxx 

PS:  Don't forget your Clocks go forward tonight!!