Monday 29 April 2024

My First New/unused Challenge card


Good Monday Morning Ladies, 

I hope that you all have had a relaxed weekend,  let's face the weather made it hard to do anything but stay inside and relax!  I did manage to do some 'potting' on, my lupins are growing like champions,  they needed bigger pots, the peppers needed potting on too, tomato plants will be next, growing your own veg is definitely time consuming!!   Hopefully it will all be worth it. 

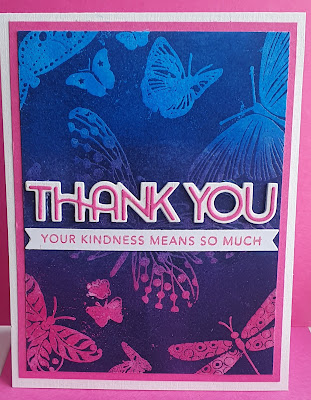
Today's card I made on Friday, the stamp is a DarkRoom Door 'Word Block Stamp' called 'Hello'.  Frustratingly it has been cut a bit wonky after its been made and as Sonia will confirm having a wonky edge made it a right pain to stamp straight, I did manage eventually,  the wonky cut is on the top so I lined it up on its side in my stamp platform.      After stamping I embossed with white powder and heat set so that I could do emboss resist,  I then went in with some lovely bright Distress inks, which make the white embossing pop even more, after adding the colour I gave the whole piece a good buff up with a soft cloth and mounted it onto a black mat and then onto a white base card.  I stuck with the 'Hello' theme for my sentiment, keeping it small to show off that background.

I hope that your week gets off to an amazing start,

Love & Hugs to all of you,

Sandra xxx


Sunday 28 April 2024

Your Challenge cards


Good Sunday Morning Ladies, 

My goodness yesterday was the coldest day we've had for months,  it was bitterly cold here, I went out to the car to go shopping and you could see your breath it was that cold, this was at about 11am too, so it had warmed up a bit from when the girls left.   Lucy said that she had taken her hot water bottle as her Kiosk gets so cold, (its basically a large shed, with half a wall as a serving hatch) so trying to keep warm is a mission, she said that it isnt too bad of it's busy as you are constantly moving,  yesterday was so cold and rainy that it was dead though, so she really did need that hot water bottle!!   We got back from shopping and Paul laid the log burner ready to light for when they got in from work.  

Not much planned for today, we are waiting to see what the weather is 'actually is doing'  as the forecast is rarely right. 

Your Challenge Cards 

Karen


Karen's Description:

Here are 3 CAS Christmas cards 
1) I rejigged last weeks and used a gold Poinsettia 
2) Daisy B stamp and have forgotten name of die cut sentiment 
3 ) A left over piece of Serif print with CraftiPotentional die cut sentiment (Remind me why I don’t use it very often- oh yes It cuts each letter out individually!)

3 Fantastic Christmas cards Karen, look at you getting organised so early, I love the simplicity of that DaisyB Christmas tree, a simple but clever design, something that they get so right with their stamps,  is the lady that is left the one that designed the tree or did she do a different style??
Now I know lining up those letters on your card must be a faff but I really love the font and that paper has just the right amount of detail. 

Thank you so much for taking part again Karen, I really do appreciate it xxx

Lilian 


Lilian's Description:
Here is my card for this week
It’s an old stamp set, I think it’s called butterfly basics from Staminup.
I used faded jeans oxide ink, to stamp and colour.

I picked a card from the archives for Lilian today, I think we can all totally imagine the pain you are in from Friday's horrendous Dental appointment,  you must be feeling so miserable,  I think that anything to do with teeth and mouth pain (i have struggled with mouth ulcers over the years, I do wonder if its hereditary too as Matt suffers terribly with them,  Lucy & Becca).  I hope that you are feeling a little more comfortable today my lovely, we are all sending you gentle hugs xxx

Ps.  Your card is simply beautiful,  this was my first SU stamp set and I love it, you have shown it off perfectly, your shading is amazing aa always xxx

Maria 


Maria's Description:

My CC's for Sunday. Hope they are alright. It was hard making CAS, need to practice that more 😊

1) used here a greeting stamp and just coloured it in with my pens.
 Years ago I made up a lot of these decoupage things and found the bag in the moving around so made two cards here with them.
2). Used the paper and flowers for this card and
3) took your idea with using a stencil to make this background and some decoupaged flowers.

Have a great weekend. Love and hugs to you all, xxx.

OMG Maria,  3 beautiful cards 😍,  your first card sounds simple from your description but it looks like it took you a while, your colouring is perfect! 
What an amazing find,  your decoupaged are lovely,  it must have been like finding hidden treasure!  I love how you have used them,  your second card looks like the background was made to match the decoupaged flowers, the soft colours are lovely 
I am honoured that I inspired you a little with your third card, I must day that the stencilled area has given the perfect backdrop for your flowers.

Thank you so very much for 3 beautiful cards xxx


Sonia 


Sonia's Description:

The die cut circles are cut from my smooshing on baking paper. I used Tim Holtz butterfly and sentiment from The Stamp Market.

Sonia has had a very busy week, with working and travelling to see gorgeous little Teddy and then driving all the way to see me too so she didn't get around to making a card.  I had a quick flick through some older C&S designs and picked this lovely card, its very much worthy of a second showing if nothing else it's great inspiration for using up inky backgrounds, I never think to die cut them down to smaller elements!! 
Thank you for the Inspiration my lovely,  I hope your day at work whizzes by as fast as your days off !! xxx

❤************❤

Janet, I hope that you are ok my lovely,  sending you love and hugs xxx

Lynda, I hope that you and Terry are looking after each other, sending love and hugs to you both xxx

I hope that today is a little warmer than yesterday and that you all have a lovely relaxed day,

My Love & Hugs is winging its way to all of you,

Sandra 
xxxxxxx

Saturday 27 April 2024

Mixed Up Saturday


Good Saturday Morning Ladies, 

I hope your weekend has gotten off to a good start, we switched things around this weekend to try and work around the weather, we usually get shopping out of the way on a Friday so that we have the weekend free, but the weather was okay yesterday afternoon so Paul got loads of work done in the garden while I did a tutorial for today's blog. 

Jacob's Coat Technique 


This looked a really fun technique, it was a bit messy I will admit,  but the results look amazing! 


I started with a piece of white card and chose three colours of Distress Ink


I blended the three colours across the card (in hindsight I would choose a lighter purple).  Before moving on to the stamping you must make sure your ink is dry. 

Choose your stamps and create your design in Versamark ink, then add Clear embossing powder.


Heat set the embossing powder, making sure its all shiny. 

Now comes the messy part.....

The colour used to create the Joseph's coat technique is usually Black, but I think any really dark colour would work, so I went with Night of Navy, you take the ink and a blending brush and cover the whole inked piece.  


Then take a soft Cloth or Kitchen paper and buff off any excess Blue ink, this will then reveal the pretty colours that have been locked in by the clear embossing powder.  Having the dark colour all over makes the base colours really pop.


To finish the cards I picked a colour from the background and used that to mat and layer and for the accent in the sentiments.  I mounted the card onto a white card base which made the colour pop even more. 

What do you think ??  I have started a couple more to share with you next week.  If you have any questions please feel free to ask.

****************

I hope that you all have a lovely weekend, 

Love and hugs to all of you,

Sandra xxx 


I

Friday 26 April 2024

Thank goodness it's Friday


Good Friday Morning Ladies,

Well it only seems a few days since we were welcoming April and here we are at the last weekend.  It's crazy isn't it ?!  May is going to be a busy month for us, so that will probably whizz by too.  

Have you all got plans this weekend?  We have a quiet one thankfully, weather permitting I'm sure we will be in the garden. 

Janet I hope you are ok my lovely XXX 

Our Next Challenge 

This week our Challenge is for you to use anything you have in your stash that you haven't gotten around to using, or maybe you have something and had a go with it but not made a project with.  I think most of us have 1 or 2 things hiding in our stash somewhere,  it could be a magazine (me)  or a pot of Crackle Medium (me) ....here is some of my unused stash (this feels like a confession) ....


I have to say I feel a bit uncomfortable sharing this lot, quite a bit of it is Facebook destash bargains!  Some I have had months but not got gotten around to using ☺️😘

I hope that you all find something to create something with!  xxx

I hope that you all have a good Friday,

Love & Hugs to all,

Sandra xxxx


Thursday 25 April 2024

Some Thursday Throwback cards


Good morning my lovelies,

I hope today is a beautifully sunny one wherever you are, we had a mix of cloud and sun yesterday,  we managed to get washing dry though, which is always a bonus, I had a lovely visitor yesterday,  Sonia very kindly drove all the way over to help me choose a dress for Emily's wedding, I really did appreciate that you drove all the way to help me my lovely 😍 

We did play about with some crafting in the afternoon but I didn't get to finish a card so I thought I would share a couple of 'throwback' cards, from 2019 (how is that 5 years ago)

The top one is a Alcohol ink background, the second is the 'caught in crystal' technique. 

I hope that you all have a lovely day,  

Love and hugs to all of you, 

Sandra xxx


Wednesday 24 April 2024

Simple Die Cuts


Good Wednesday Morning Ladies, 

We had lovely sunshine yesterday it was still chilly though, the sun does warm the house though, mind you we have huge windows,  we commented on them when we looked around the house and Bill who designed the house said yes they are big windows because sunshine is free and it warms the room!!  He is a man with thinking the same as Paul's!!  
Lucy and I popped into Witney to return some parcels and pick up some more from next.  Fingers crossed one of these dresses works!!  I think Sophie is on her 4th choice too.  Lucy chose well and loved the dress when it came, it was too big though so she is waiting on the smaller size.  

Today's card was a quick make at the end of the afternoon,  I used Crumb Cake ink to stencil a little detail on the bottom right of the card, I the  used some scraps of card to cut some die cut some stems, which I adhered over the stencilling.  I tied some twine around the stems and added a sentiment.
Quick & Simple but I think I like it.

Sending love and hugs to all of you, 

Sandra 
xxxxxx

Tuesday 23 April 2024

Coloured Embossing


Good Morning Ladies 

Hands up who had to put their heating on last night??!  It got so cold as the afternoon went on, I was sat in a really thick fleece with a huge throw wrapped around me but I was still cold,  I did wonder if it was just me feeling the effects of Uti but Paul and the girls were cold too, so Paul put the heating on and prepared the log burner just in case the heating wasn't enough.  We had the hot water bottle to take to bed too.  They did say that there was a good chance of a frost this week, you just never know where you are with our weather. 

Today's card was inspired by a Marion Emberson feature in the Creative Stamping Magazine,  she used different coloured embossing powder to add colour to her stamped flowers.   Now my first couple of tries just didn't work, it was like the embossing powder had been absorbed into the card, it wasn't raised or shiny, but the colour was there, so I changed from Perfect Medium to Versamark and changed the card too,  which did make a difference.  So I stamped the flower four times, the flower is a Tim Holtz stamp, once stamped I used a combination of embossing powders in various pastel shades, adding one colour at a time then tipping the excess back into the jar before moving on to the next colour.  It us a Clean and simple look, I'm not sure I love it though, I think I should maybe have used a bigger sentiment, but I didn't want it to be too busy.  I also love those Julie Hickey sentiments !                              I tried to capture the shine of the embossing without much success, you will have to imagine it. 🤣😂

I hope the sun shows up to warm your day, 

Love and hugs to all,

Sandra xxx 


Monday 22 April 2024

C & S card using a Tissue Technique Background


Good Monday Morning Ladies,

Welcome to the start of another week, we are on the run down to the end of April,  another month whizzed past, with Emily's wedding on the 3rd weekend of May I think that month will whizz by too.  
We had an absolutely glorious day yesterday,  I could really feel the heat of the sun while I was sat out on the decking potting on and sowing more seeds,  I got French Beans snd Runner beans started yesterday,  hopefully they will ready to plant out towards the end of May,  I did sow some carrots, Rocket and marigolds in one of the raised beds, it will be nice to see things growing in them,   ooh I did notice that a few of the strawberries have now got flowers on them, so they are liking their new surroundings!! 

Today's card really was a quick & easy card, I realised when I came in from the garden that I had nothing to post today, so I picked one if the Pixie Powder / tissue Technique backgrounds, cut a piece of card almost 1/2 inch smaller than my card base, die cut a square and placed the background behind the aperture.  I die cut the Gummiapan Dragonfly out of Vellum with a white body and placed it in the aperture,  I finished the card with a sentiment die cut in white so that your eye was drawn to that lovely background. 

I hope that you all have a great start to the week,

Love & hugs to all of you,

Sandra 
xxxxxx

Sunday 21 April 2024

Your Challenge cards


Good Sunday Morning Ladies, 

We were blessed with a lovely sunny day yesterday,  although it was still chilly.  It was lovely catching up with Brenda, Karen, Maria & Sue.  We were too busy chatting to get any crafting done!  It was a little frustrating that the hotel didn't do hot lunches, we had to make do with very poor selection of sandwiches,  luckily Paul came back in the afternoon with a lovely selection of cakes from M&S!  

Let's have a look at your cards  ...

Your Challenge cards 

Karen 


Karen's Description:

scored card with a Sue W poinsettia A printed sentiment cut on ScanNCut with an offset line of 1mm

A perfect Clean and simple card Karen, that new ScanNCut has earned its place already!  Do you find your using it more as you don't have to faff about with blade depths etc ?  
Thank you so much for taking part in this weeks challenge XXX 

Lilian 


Lilian's Description:

Here is my card for this week, old stamps, which I have had for years, so I can’t remember the names. The little leaves boarder stamps are so useful. The primrose is an old stamping up set with butterflies and small filler stamps. Used my zig pens to colour, as usual these days.

I have that stamp set and always overlook it, that primrose is so beautiful though, coloured beautifully as always, the stamping around it gives the illusion of a beautiful frame.  Thank you so much for making a card for this challenge my lovely XXX 

Maria 


Maria's Description:

My CAS cards for Sunday.
1) I scored a few lines on the side. Made two flowers by stamping and used Distress Oxide in Carved Pumpkin, Crackling Campfire and Ripe Persimmon.
2) Here I just used colours in pink and purple paint and brushed directly onto the card. Used an old stamp from my stash and the card was finished.

Oh wow Maria those flowers are so pretty,  I love the colours you have used, a beautiful Clean & Simple card.  
I absolutely love the stamped scene on your second card, that could be so many places, it could definitely be the lighthouse at the end of the breakwater at Brixham.  
Thank you so much for taking part in the Challenge XXX 

*********************

Fingers crossed for sunshine today,  I hope that you all have a lovely relaxing day.

Love & hugs to all of you,

Sandra 
xxxxxx

Saturday 20 April 2024

Mixed Up Saturday


Good Saturday Morning Ladies, 

I hope that you are all relaxed and ready for the weekend, what are you all up to this weekend? 

Today is going to be a good day as I get to see some lovely friends,  for a good catch up and maybe a little crafting.  Such a perfect start to the weekend.

Tissue Technique Background 

Some off you commented on the Tissue paper background I did the other day so I thought I'd show you the process using different colour mediums so that you can all have a go with what you have.  

The start process is always the same regardless of what medium you use....


Take a piece of card and cover with any dries clear glue.


Make sure you spread it over the whole piece of card, right up to the edges.


Take a piece of tissue paper and scrunch it up so that it fits the size of your card 


Push tissue paper right into the glue, making sure its all touching the glue, you can now trim the edges carefully. 
For this type of tissue Technique the method is the same up to this point, the only difference from now on is the colour medium you choose.

Adding Colour 


This first one I used Pixie Powders,  I picked blues & greens, sprinkled the powders all over the background and then spritzed with water. Have a piece of card ready to 'Smoosh' the water and powders together...


Lay the piece of card over your background and smoosh it right into the powders abd water, this mixes everything together.


Peel that top piece of card away to reveal the magic! Now set this to one side to dry


Don't waste the overspill of powder give a couple of spritzes of water and then mop up that gorgeous colour combination with a piece of card


This is what you will get from the waste!!  Perfect for die cutting or using as a mat. 

Spray inks


Place your tissue covered card into a box to keep the mess to a minimum, then choose your colours


I used Tim Holtz Mica Sprays in green with a bit of blue. 


Once sprayed you do exactly the same as above, spritz your coloured piece with water and take a piece of card to smoosd the colour into the tissue, 


You always get a bonus piece of coloured background to use that way! 


This one was Tim Holtz sprays too, I repeated the same method as above.


These were my bonus mop up pieces! 

Distress Oxides


Now I know that some of you don't have sprays or Mica powders, so I thought I would try Distrss Oxide inks,  I smooshed a selection onto my glass mat and spritzed with lots of water,  I then took the tissue covered card and really smooshed it into all of those inks, I added more water at one point,  you have to move your card around to get good coverage but it definitely worked !!  If you want to add some sparkle,  you could add a pearl mica or pixie powder or add a few drops from a clear sparkle pen. 


This is the Distress Oxide results, it looks amazing!  

I cannot wait to see how these all looked when they dried. 

Acetate & Alcohol Inks 


Take a piece of Acetate (use heat resistant if you want to stamp on it).  Have your piece of tissue paper ready. Gather your Alcohol inks and tool.


Add your inks to your acetate and use the tool and felt to spread the around the acetate, I used a little blending solution to get the colours mixed in.

 
When the alcohol ink is dry I sprayed some adhesive over the acetate and stuck the tissue paper to that. (Because I didn't know how pva type glue would react with alcohol ink) 


This is the look at this point, I felt that the Tissue needed to be stuck down a bit more so ........


I took a piece of white card and added glue as I did for the stage above.  Stick the adhesive to the tissue on the acetate and press down firmly so that the glue gets pushed right into the tissue paper, this gives a much stronger piece to stamp onto. 


Doesn't it look amazing??? 

The Results


Pixie powder results. It was impossible to capture the sparkle. 


Mica Spray, you can just see the sparkle on the top photo. 


Second Mica spray, the colour is lovely on this one, you can just see glints of Mica 


Distress Oxide background, colours a more muted but still looks lovely. 


Alcohol ink and Acetate results, this would make lovely die cut leaves. 

***************
Such a fun technique with great results,  some will make lovely backgrounds,  others will make beautiful flowers or butterflies.  I cannot wait to create with them all. 

I hope that you enjoyed this tutorial,  if you have any questions please ask. 

Have a lovely weekend,  fingers crossed for some sunshine. 

Love and hugs to all of you,

Sandra
xxxxxxx