Saturday 31 January 2015

Guest Designer Myra!!!!!!!


 Good Morning Ladies,
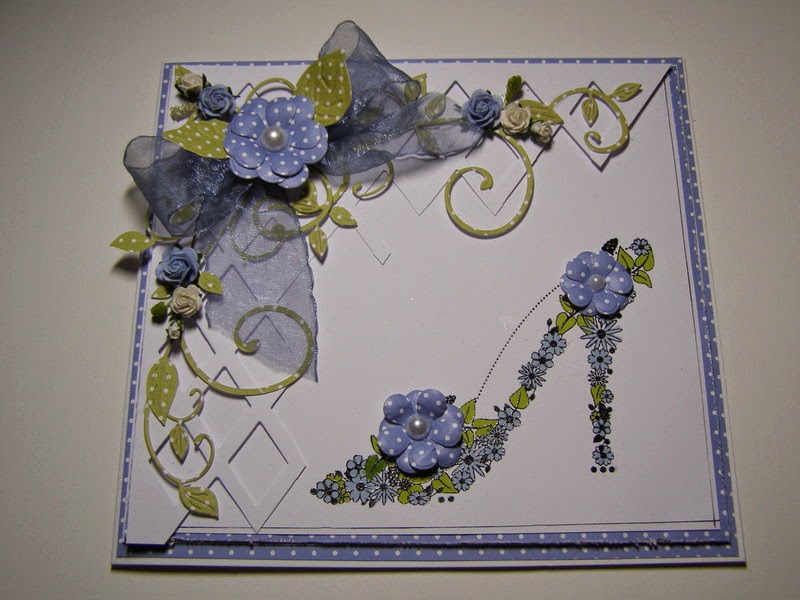
I am so honoured that Myra has allowed me to show one of her gorgeous cards today, isn't it gorgeous! I love everything about it, colour and composition!
Here are Myra's instructions.......
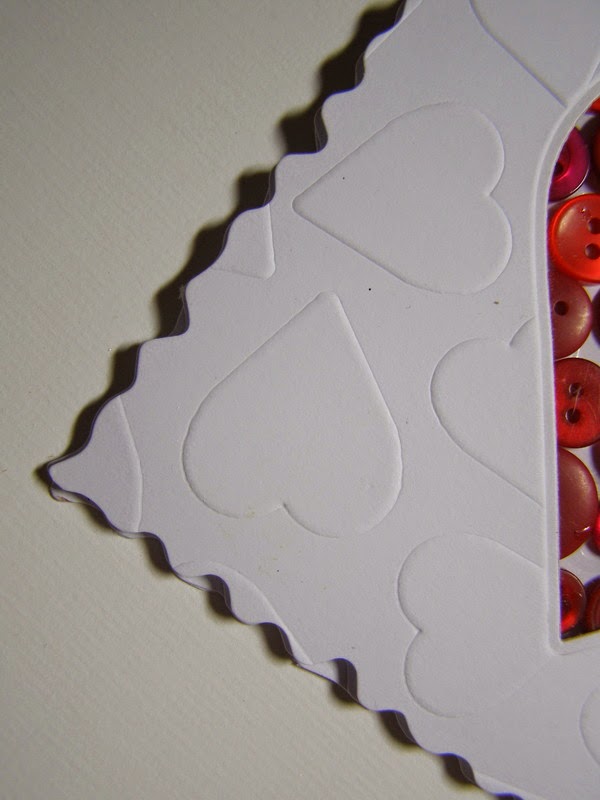
I cut a piece of Soft Gold Card from the Foundation Cardstock from Creative Expressions. I taped the Gemini Lyra Die to the bottom and ran it through the GC. I mounted this using Cosmic Shimmer glue on a slightly larger piece of Soft Pink card from the same range. This shows off the beauty of the Lyra Die. 
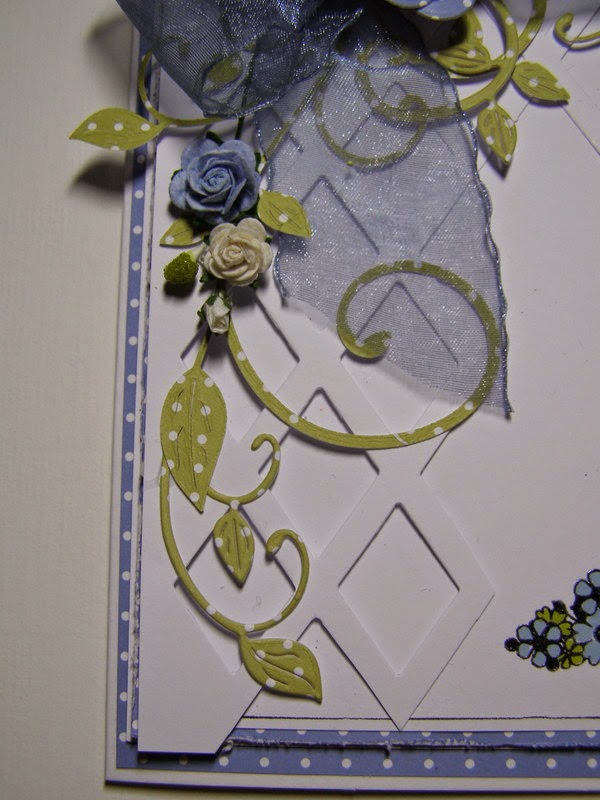
I cut out seven flowers from the Delicate Daisies Set from Sue Wilson. I cut these in differing sizes. Four in pink and three in gold. I layered these , alternating the colours and again using Cosmic Shimmer Glue. I topped them with a Frosted Peach Dazzler from CE. Strangely the pink Dazzlers I had were just the wrong colour for the soft pink. I cut one Grand Vinery Die also in soft pink.
I stamped my sentiment and then cut it out using the second smallest die from the California Collection. I used Tattered Rose Distress Ink to colour it to match. 
I assembled all the components and mounted them on three further mats. I finished the bottom left hand corner with a pearly swirl! 
I do hope this is clear. I have never done this before and would like to thank Sandra so much for encouraging me to do this. When I started it was going to be square but it finished up oblong. 
Thank you Myra, I think that seems quite straight forward to follow.
What have you ladies all got planned for this weekend?
Sophie and Lucy have football today, I think that they could do with one of those Liberty Bodice things on days like today, but they have to make do with thermals! They are more dedicated than I would be.  Unfortunately once again I can't go and watch them as the pitch they are playing on is the furthest from the club house and therefore I wouldn't see anything, the grass will be to muddy to try and push the wheelchair across too, never mind I will stay here, cosy and warm and may bake something nice for their return, as well as a hot chocolate with all the extras, whipped cream and marshmallows of course, should I put it on the coffee shop menu ? with a nice home made brownie or chocolate fudge cake!
Both Paul and I have had a dream to open a Craft Shop with Coffee shop/Tea room combined, as his love is 'proper' coffee and has been for many years before it was trendy! We are a great team and I would love working with him, we would make a great team.
Do you think it would work, my first love is card making but a close second is baking!
I want you all to know that you shouldn't feel the need to apologise for 'rambling' on or 'ranting',
I am the most happy when your posts are long and 'passionate', I also love the fact that you check back later on in the day and interact with each other, its amazing, I love it.
You ladies are just amazing, love you all loads.
Myra a HUGE thank you to you my lovely friend, I am so grateful to you allowed me to share your lovely card xxxx
Crafty Hugs
Sandra xxxxxxxx

Friday 30 January 2015

Peach Posy

Good morning Ladies,
Not my usual style, but just a quick card for when you need a card in a hurry!
I took a piece of paper from my stash that has oranges, peaches and yellows on tiny flowers,
I matted it onto some matching plain dark peachy coloured card and (lord forgive me  as I have given in to my inner Ms Bibby ) mirror gold card! Yes I know, Calm down, I rarely go there, but I think this card needed it! I did the same Matt and layers for the strip across the middle, die cut two Cheery Lynn Flourish dies (one is cut into the back of the sssshhhh (mirror ) card so that it looks opposite to the first one! I placed those opposite each other and added three flowers that I made using Docrafts  Petal Posy Dies (that I borrowed from Pat).  I put a flat back gem in opposite colours into each flower, my sentiment is on Spellbinders Tag die, base cut in (you know what)and topped with same card as used in flower!
I hope you like the card, I am not sure myself, no bow, no spray
Of flowers!
How and when did you all start crafting and tell us about
Any crafty disasters!
Hugs
Sandra xxxxx

Thursday 29 January 2015

Guest Designer Pat (Witney)

Good Morning Ladies,
Do you have the promised snow?????
Todays card is courtesy of my lovely friend Pat, its so pretty, I have downloaded a brief description below....
The bottom photo sits inside as you can see from the top picture. The stamp is from Woodware and its a clear magic one. Two pieces of card sit on top of the card. You stamp out the Rose onto a piece of card and cut it out. You then put this onto the top piece of card and cut it out to make the aperture. You then stamp the verse into the aperture, and stamp the Rose and verse onto a separate piece of card and colour it in. This then sides into the card front as per the first picture. I do hope this all makes sense to you.
Such a pretty card, don't you think, thanks Pat so much for sharing your lovely creation.
Pat really enjoys stamping and it shows, she is very good at it, whereas I am a bit nervous, usually resulting in a mess, so I always stamp my sentiment on separate card to anything I am doing and die cut it after. That's the safe method!
I hope that you are all well and warm and safe!
Lets hear about some of your superstitions and Old wives tales today, if you like or if you fancy discussing another topic fire away.
Sam, your friends show on Create and Craft was brilliant yesterday, some fabulous products, you lucky lady, getting to play with some of those fab products.
Welcome to any new visitors today, please stick around and join in the madness! We do have a giggle! You won't meet a friendlier, lovely bunch of ladies anywhere else, well apart from Sue Wilsons Blog, as we all go on that fab blog too!
Sending You all Warm Cosy Hugs
and Lots of love,
Sandra xxxxx<3xxxxx

Wednesday 28 January 2015

Pretty Purple just because!

Good Morning Ladies,
I hope you are all well and not in too much pain.
Todays card I made because I fancied doing a purple card today. 
I took a piece of Coconut white card and used to Spellbinders A2 Scalloped Borders One to cut
a decorative border to the top and bottom of the card. I then took a piece of purple card and cut it to
fit under the white card, leaving a tiny border and stuck the two together with Cosmic Shimmer Dries Clear Glue.  I cut a Spellbinders Large Floral Oval die out of Coconut White card and then stamped the largest of the Justrite Kindness stamps onto white card and cut it out with the matching Spellbinders Labels Twenty Die, I used Seedless Preserves Distress Ink Pad and embossed with Cosmic Shimmer Clear Embossing Powder. I then Stamped the 'Just Because ' Justrite sentiment onto a white card cut with Spellbinders Scalloped oval.
To put the card together I wrapped a piece of purple ribbon around the middle of the card and stuck it down at the back of the card and then mounted the Floral Oval onto the card with mounting foam for dimension.  I then put the stamped Label 20 on top of that and the scalloped oval with sentiment on top. I made a flower but cutting six of Creative Expressions Classic Rose die cuts out of the same purple card and offset them and pushed a brad through the centre, moistened them with a mister and scrunched them up to look more like a flower, I added two white roses to I for balance and another on to the centre of the bow, which was made from the same ribbon as around the card.
I made a stick pin with a matching coloured bead and added two more and some pearls along the top and bottom of the decorative borders and pearl swirls too.
I hope you like the card today.
Its fun day today as Pat & Sue are coming over! YAY!!!!!
Someone choose a fun topic for the day, it could be anything from craft disasters to worst purchase or something funny.
I look forward to reading your comments.
Love and Hugs
Sandra xxxxx

Tuesday 27 January 2015

Something Different with Sue's Bow dies!

Good Morning Ladies,
I am thinking that this card may not appeal to all of you but it does have a Bow!
I just thought that I should feature pesky men's cards from time to time, so here you go
Its quite straightforward to see how it is done, the black card is 7inch wide and a cut a slit down
it about a third of the way at exactly 3 1/2 inches (middle), I then folded back the wings evenly and put a little nick in to make it look like a proper lapel. I took a piece of coconut white card embossed with Checkerboard Pin Point E Folder By Creative expressions. Folded over a good inch on a rectangular piece of card, cut just over a third of the way in on each side just under the edge of the fold and then fold the top part in to make the collar of the shirt. I then made up one of Sue's Classic
Bows from Creative Expressions and popped it on the collar of the shirt with a glue dot.
I cut a small triangle of the card that matched the bow tie and then cut a rectangle 'pocket top' shaped piece of card to lay over to make it look like the handkerchief was poking out of the pocket.
I then just added a few buttons to make it look a bit more realistic!
What do you think????
I hope Tuesday finds you all well, I think I am just about recovering from my Friday night acrobatics, I have asked my coach to give me a week off this week to recover, I obviously had to get a note from my mum!! But the coach apologised and said he really was pushing me too far by expecting me to carry a dish of Salsa and walk to the table! hahaha
Love and hugs to you all, if anyone wants to start
a new discussion topic feel free!
Sandra xxxxxxx

NEWSFLASH!!!!   Before you buy any of the Justrite Stamps today on C&C with Julia, check out
Craft Clearance.co.uk  the Justrite stamps are all reduced, some by half price !

Monday 26 January 2015

Pretty Pink Floral Birthday!

Good morning Ladies,
I thought I would go pink and flowery today, to brighten the start of the week!
Quite a quick and simple card today, basically I cut Majestic Labels twenty Five in coconut white card and used foam pads to stick it onto some American crafts pink card, leaving a small border of pink showing and Matt it on to some more coconut white card, the centre of the cards is simply the centre section of the die, with a Justrite sentiment stamped on and embossed with Cosmic Shimmer Clear Embossing Powder. I mounted this onto pink card with film pads for dimension.
I arranged some pink and white flowers on either side of the centre piece with some foliage to lift the flowers from the background, I then simply added a few pink pearl to finish the corners!
I hope you like this quick and simple card, handy for those emergency times, when you need a quick card, put pretty too.
Well I hope you have all got an exciting week planned, I think I might just treat myself to a best set of dies this week, I feel like I deserve it after last weeks dramas! But which ones??? There is too many I would still like.
I also can't believe how many larger format machines are coming onto the market in the coming months. Sizzix, Tonic & Spellbinders that I can think of but I am sure there are
many more, you wonder how they all find enough business, but then I guess it just proves how big the craft market really is.
Huge Hugs
Sandra xxxx

Sunday 25 January 2015

Guest Designer!!!!! Barbiepinkfairy & Diego draws winner!


 Good Morning Ladies,
I got a day off today as this gorgeous card is designed and made by the lovely Barbiepinkfairy!
isn't it gorgeous.  I do love Anna Marie Designs pink dotty card, such lovely cards and top quality too!
As you can see the inside is decorated beautifully
to match the front, so pretty, that little flower is beautiful.
A box to match too, this is more of a gift than a card,  like to make boxes for all of my cards, it just adds and to and completes the design, plus with the flowers, bows etc can become a little damaged in an envelope.


Now for the Draw, may I introduce to you Diego, my daughters dog, he is quite a cutie, he is a Cockapoo!
Where do they make these names up????
Anyway with a few treats we managed to get him to choose a name, we then had a little trouble getting him to give us the piece of paper back! Below you can see him picking a winner and almost eating
it!
 Our winner is..........................................................................
CraftySuetoo!!!!
Congratulations my lovely,
email your address to : paul.riley01@ntlworld.com

Huge Hugs, Sorry about photos being all over, I am rubbish at technology!
Sandra xxxxx


  Winner !!!!!!

Saturday 24 January 2015

Saturday Give-away!

Good Morning Ladies,
Well what can I say to thank you for your love, kindness and support yesterday, you all made such a huge difference to my day, which ended pretty much as it started ....with a bang!
Yes you guessed it, whilst carrying just a little plate of food to the dining table my knee gave way and I hit the deck, crashing down onto my knees and banging my hip into the coffee table as I went down, what a ninny! But as the hours are ticking past I am getting stiffer and stiffer! I think me knee took most of my weight so I guess I won't be going far today!
Today's card is made for all of you, as you are all so kind.  Its just a small little thank you style card but its big on meaning!
I used Creative Expression California Collection Decorative Frames set (B) for this card, I cut the largest die twice, one in white for the back of the card, and one in this gorgeous dark violet colour,
I scored the white frame about 3/4 of an inch down along the width of the card and put some Cosmic Shimmer Glue on and held the violet colour card lined up in place on the front of the white frame, this forms the card base! I then cut the decorative section of the Hollywood Die set from CE, in green card, that really complemented the violet! the next layer from Dec Frames (B) in violet and then I stamped my 'you are so kind' sentiment using Egg Pant Adirondack ink and clear embossing powder onto a small green frame.
I added three little complimentary roses and three die cut leaves and finished with a double bow of green and purple ribbon with a green glittery brad!
I hope you like this card as it is going to be a GIVE AWAY today, not much I know but it is sent with my heartfelt gratitude.
So leave a comment below and I will put your names in a hat and get someone in this crazy house to pick a winner!
I just wanted to give a little something back as I am finding it hard to express my depth of gratitude for all of your kindness and support!
The draw will close at midnight tonight.
Oh before I go I got an email from Once Upon A Stamp introducing a large A4 format Sizzix Bigshot Plus ! so we have another machine to add to the mix!
Crafty hugs my friends
Sandra xxxxx

Friday 23 January 2015

Stressful Day!

Good morning Ladies,
As you can see there is no card today, I am truly sorry for not posting a card.  My day kind of went down hill yesterday.
As most of you are aware one of my youngest daughters Lucy had repeat surgery on her eye last year.
Well the results were ok but not perfect and the appointments dragged on and on, anyway back in November they signed her off from the hospital saying that her sight should improve with the exercises she was given, we then had a further opticians appointment saying similar apart from that she may need glasses for long sight, but that would not happen until she had fully strengthened her muscle in her eye after her operation (as glasses would make the muscle weaker) so once again we were told to continue the various exercises that were given and Lucy would be seen at her 6 month scheduled check up!
Well, Lucy went back to school and she has some exams coming up that count towards her final GCSE exams,  from here I am at a loss as far as knowing what happened at school, but I am guessing Lucy must have told them that she is still struggling to see ( which we weren't aware of at home).
I have received two phone calls in the last two days, one from our Opticians who said that they would try and contact Lucy's own Optometrist as requested but make take a few days and then I get a phone call from the John Ratcliffe Hospital stating that they had made Lucy an emergency Orthoptic appointment as requested to assess the level of her problems.  Now I am sat thinking WHAT,!!?..
Who has made these appointments and what is going on, just bear in mind ladies that I am here in this house for my children to talk yo 24/7, they aren't 'latch key' kids who never see their parents, this has been the ONE benefit of being disabled, I am always here!
Anyway to cut to the point, the School Nurse and SEN were so concerned that MY daughters sight problems weren't being addresses proactively enough that they decided to take the matter on themselves, ringing the hospital to discuss Lucy's case with her consultant, after the optician gave them the name and contact details off Lucy's consultant!  How can they be allowed to do that without
my permission ? I just don't get it, they clearly as Lucy informed me last night , think that I am not 'bothered' that she is struggling! Can you actually believe this?  I am absolutely devastated I can tell you. Both Paul and I live for our children, we give them everything we can afford to give them!
Please tell me that you would feel the same, I can honestly say that I knew nothing about the fact that she needed this much intervention, she manages to sit and look at her little Ipod for hours at a time and sit on the computer, but it was her ICT teacher that was one of those concerned, Lucy must gave forgotten to tell them she spent 3/4 hours on the lap top some days over Christmas playing games!
So sorry ladies for the rant and lack of card, we came back from hospital at about 6.30 last night and I had to one straight to bed. By the way, the hospital found nothing new and told her as before to continue with her excersises, funny that, just as I thought!
Please comment as usual, I need your wonderful comments to make me smile more than ever today,
If you are stopping by for the first time this really is a one off blip of a day, normal postings will resume tomorrow !
Apologies once again,
Warm Hugs too,
Sandra xxxxxxxx
Could either Theresa, Tina or Margaret, please email me Steph's email address, she gave permission
yesterday please email it to
paul.riley01@ntlworld.com
I have some information for her xx
Thanks my lovelies xxxx


Thursday 22 January 2015

New York Blues!


Good Morning Ladies,
Todays card was inspired by the Die Set, this is my first play with the New York dies.
I started by matting a piece of blue card onto an 8 x 8 card base, I then cut the New York Union Square die decorative section in white card, then the next size down again in blue then the little fancy centre in white and matted and layered them altogether, using foam tape, for dimension.
I then cut another larger matt in white and embossed with Creative Expressions A4 Interlocking
Circles folder, I cut a square aperture out of the centre diagonally with Spellbinders Grand squares, I placed this matt over the blue, using mounting foam tape got dimension and placed it so that the aperture was in the centre of the card, I then placed the New York focal element into the aperture.
I used Spellbinders D lites floral corner 1 to embellish the corners of the card and added a pearl to the centre of each flower.  I stamped a Justrite sentiment onto blue card and embossed with Cosmic Shimmer True white Embossing Powder and cut it out with a Spellbinders Classic Circle die,
I mounted this on top of the fancy centre piece of the Union Square die,
I added a bow, because it seemed rude not to, using white ribbon and a little piece of blue and a good old pearl in the centre.
I do hope you like the card, it is a little bit of a different card for me, but you know they say ' a change is as good as a rest'!
I look forward to reading your lovely comments,
Maureen had some good tips in yesterdays post about using half size plates with the Grand Calibur to reduce the amount of turning the handle for those of us that struggle at times, she also mentioned that after cutting a die in her Ebosser she had to finish it off in the GC which rather negates the point of having an electric machine!
You all raise some really valuable points in your comments which are so useful to someone looking to buy or advice on using a machine and I think its brilliant, please keep it up, I love also that you are interacting with each other, that's exactly what I hoped you would do,
Love you all,
Hugs
Sandra xxxxxx


Wednesday 21 January 2015

Peaches & Cream


Good Morning Ladies,
Peaches and Cream, that's what was on my mind today, so that's what i decided my theme would be.
So I got out my  Decorative Elements Labels 8, I cut the largest size in Peach Coloured card, the next size down in Cream Card and smallest size I cut twice, once in each colour, I stamped the Creative Expressions Sentiment in Peach Bellini Adirondack ink and covered with Cosmic Shimmer Clear Embossing Powder, I then used the smallest of the Spellbinders Label 8 dies to cut out the centre of the peach coloured die cut, I mounted the two together with a tiny amount of dimensional glue gel. I them mounted the layers onto each other with foam tape.
The Background is a plain white 8 x 8 Card that I covered first with the peach coloured card and then the cream that was embossed with Sue Wilsons Heart Lattice Embossing folder.
I mounted the focal element onto the card base, added a couple of flourishes and some peach and cream flowers with a few leaves for contrast, a butterfly in the top corner gives a bit of balance to the overall design, with a Creative Expressions Pearl Swirl trail.
A few pearls to finish the corners and that's the card complete!
I hope you like it, please leave me your comment below, We had a new follower last night, so Welcome Littlelamb, you are more than welcome to join in our fun.
Thank you all for your lovely comments,
Exciting day to day, off to Pats with Sue for some crafting and chatting, seems like forever since we last met so I can't wait!
Huge Hugs to all,
Sandra xxxx

Tuesday 20 January 2015

Back to Black....& white!

Good Morning My Lovelies,
I hope you are all well, or feeling better1
Todays card, was created from my box of bits and pieces, experiments and just general odd and ends.
I stamped the Justrite 'ironworks' stamp, as soon as I bought it when it was on special offer on Sue's stand at Ally Pally, I stamped the block up with Perfect Medium, I used the method that Sue does where you ink the stamp on the table and put the card over the stamp and rub gently, I then added Cosmic Shimmer True White Embossing Powder and heated. I trimmed the black card to a few millimetres and added a white matt. I had an off cut of white card that I had embossed with Creative Expressions Rows of Bows Embossing Folder, stuck it to the stamped image and trimmed to fit, I then mounted the whole thing onto a black card base. I used the Italian Border cut in black card to cover the join in the card and added a pearl string across the top of the border. I tied a ribbon with black silky crush ribbon and topped with two die cut leaves and a Creative Expression Ribbon Rose in black in the centre. I made a stick pin with black and white beads and added two ready made ones to finish off.
I hope you like the card, please leave me a comment, as you know I look forward to reading them everyday.
We had an appointment at the Vets last night for Bella to have her stitches removed, only she slept in our room last night and I heard her nibbling and gnawing and guess what.... the little minx had removed her own stitches! luckily she waited until the day before the day they were supposed to be removed, or we might have had some problems. As it is the Vet said she had done a very neat job, thankfully! if its not kids its the pets!
Love and Warm Hugs to all of you,
Sandra xxxxx

Monday 19 January 2015

Simple Valentine Card

Good Morning Ladies,
Well I thought I would start the week off with some love!
I took a 6 x 6 deckle edged card and die cut a Heart in the centre of the front, I then left the die in place and took a heart Mask and ran it through the Grand Calibur with the emboss sandwich, this way
I could retain the crisp edge of the heart. I then cut another piece of card just slightly smaller than the 6 x 6 card and placed the card front over in the place where it would be stuck down, I then used a pencil and lightly traced around the heart onto the backing, this is so that I new exactly where to place the assortment of red buttons, which I did next sticking them with Cosmic Shimmer Glue,  I backed the aperture with some acetate, then surrounded the edge of the card with foam tape for depth and dimension and placed it carefully (making sure it was lined up) onto the backing card.
I tied a piece of red ribbon around the top of the card and tied a tiny metal key (to my heart) in the middle of the knot.
A very simple card by quite effective I think, you could use anything in the aperture and have it any colour for anniversaries, but this little card is carrying a HUGE amount of love to my valentine!
I would love to hear your comments and anything else you would like to talk about. Mind you I kind of like the sweet topic we have at the moment. How many more subjects beginning with 's' we have covered Soup and Sweets!
I would like to welcome both Sam and Maureen, who have both joined us for the first time this weekend, every time we have someone new, you would think I had won the lottery, a bit daft I suppose but this blog has bought happiness to my life! thank you all xxx
love and hugs
Sandra xxxx

Sunday 18 January 2015

Sweet Card for Special Friend!

Good Morning Ladies,
Todays cards started with the stamp, its an old Penny Black stamp, it rather reminded me of three crafting friends that get together to craft!, Anyone get the similarities?
I stamped the image and coloured in with mostly water colour pens and pencils but a few bits with promarkers too. I then decided to frame the image, which I did using the Austrian Collection Innsbruck Die set by Creative Expressions, the gate the cows are leaning on has grass and flowers and a hedge at either site of the gate, I decided I would bring that out of the frame using my favourite foliage dies from Impression Obsession, also the tiny flowers are from them too, I wanted it to look like a meadow. I put the stamped and framed centre piece onto the largest die from Californian Collection Decorative Frames set (B) to lift it from the background.
I used an 8 X 8 card base and covered it with light pink dotty card from Anna Marie Designs, I then used some green card to make a border strip, I punched it with a Martha Stewart Heart Border Punch down both sides, I then threaded some green gingham ribbon through the lace and tucked both ends round the back of the pink dotty card. I added some tiny roses at regular intervals along the lace to pick up the floral element of the stamped image, I stamped the 'Sweet Friend' sentiment from Justrite onto some of the pink dotty card and die cut it with Spellbinders Standard Circle and added a green matt using the Spellbinders Scallop Circle that matched the size. I stuck this to the top of the border and topped it with a gingham bow.
I then added a piece of White Tulle, topped that with a bow made from White Silky crush ribbon, fixed together with a matching green pearl brad.  I popped a tiny rose and foliage in the top right corner of the card for balance.
Please let me know your thoughts on this card, along with any comments or questions you may have.
If you are just passing through please stop and say hi, I am lucky to have some very lovely, friendly ladies stop by my blog each day and they would be as pleased to see your comment as I would.
Thanks for all your kind thoughts regarding the party,
I think sense took control on Friday night and I decided it was just going to be too much, as it happened poor Matt has been really unwell today, he hasn't even kept down any water, I am guessing that as he has reduced immunity due to the drugs he takes for his Arthritis, the bug has affected him worse as his body hasn't the strength to fight it off, I certainly wouldn't have gone and left him, he may be 22 but everyone needs someone to care for them when they are poorly, my only no go thing is Vomit, I can't go within feet of it as I would end up doing the same, just hearing the poor lad turned my stomach today! so it looks like we were destined not to go! My friend totally understood, she said she knew how I suffered after a long journey and didn't me doing it twice in 5 hours, there were 90 people going the  party so I don't think we will be missed too much!
Well that's all for me for now, thank you all so much for your lovely comments,
Huge warming hugs,
Sandra xxxxx

Saturday 17 January 2015

Saucy Saturday

 Good Morning Ladies,
Todays card is a bit Ooh La La!
I stamped the Lingerie stamp From Creative Expressions Vintage Lingerie Stamp Set.
onto red card and heat embossed it with Cosmic Shimmer Clear powder, I then cut it out, put a strip of red line (strong) tape along the bottom of the corset and ruched some ribbon across it, you can just see it if you look closer. I then mounted this onto a larger die from the CE decorative Basics (b), in black card and covered with a sticky sheet and some Ebony Ice, I then mounted this onto the next layer which is from Matting Basics (a) Creative Expressions, in red and covered with a sticky sheet and red superfine glitter.  I then backed this with by ruching around it with American seam binding in black to compliment the die cut, again using red line tape.
I embossed a square of red card with the Cascading hearts A4 embossing folder CE, and matted onto a piece of black card and then onto the 8 x8 base card. Before sticking down I ran a length of American seam binding down the length of the card at the side and added a messy bow and topped it with a red dazzler and added a couple of stick pins that I made myself to compliment the colour scheme. at the top corner I embossed a Just rite stamp saying 'Happy Valentines Day and die cut with a heart die from Spellbinders, I added it onto the top of the ribbon with a couple of black feathers underneath it to continue the 'boudoir' theme! I finished the corset with a tiny red rose and tiny black bow underneath.
I then added a couple of bits of black pearl swirls to break up the back ground.
I hope you like the card, I understand it won't be to everyone's taste but you have to get out of that comfort zone every once in a while!
I shall be able to blog again tomorrow as our
trip to Ipswich was cancelled, due to Sophie having an upset
tummy, me having a super swollen sore knee and nobody to
watch after the kittens, also as Bella still hasn't had her stitches out I still worry about her wound and when those two fight then don't look like they are playing!
So a quiet weekend at home for us...bliss!
Happy Birthday Pat, hope you have a lovely day xxxxx
Huge Hugs to all of you,
Sandra xxxxx


Friday 16 January 2015

Green & Black Buckle Card


Good Morning Ladies,
Todays card was inspired by Our Sue Wilson, It is a buckle style card.
I started by embossing a piece of green card with the Creative Expressions Eternity Folder, I think this one is y favourite ever.
I used a corner rounder on the corners of the card, and matted it onto a piece of black card and then onto a white card base.
For the focal element of the card I cut out four separate die cuts from the Creative Expressions Californian Collection Decorative B set of dies, and On from the Matting Basics A, I used smaller dies in the Matting Basics (a) set to cut apertures into the centre of one large and two of the three smaller die cuts, I then cut the largest die from Decorative set(B) Californian Collection in white card. I stuck the white die cut onto the card with foam tape and the layered the other three die cuts together  vertically across the larger white die cut. I cut a strip of black card with a fork in each end and the matted a piece of green card (slightly smaller) on top of that, I then threaded this through the three dies 'buckling them together' I then stuck all three together and attached it to the white die cut, making sure the strip through the middle is straight.  then cut a smaller die from the Decorative Layers (B) set in the green card and topped it with the 2nd smallest of the Matting Basics (A) which I used to cut out my sentiment and edged it with Shabby Shutters distress ink. For the fancy corner pieces I used the French Frills die set from Spellbinders. I then added a few black flat back gems to finish.
I think it could make a good guy card, there are no ribbons and flowers, which is very unusual for me!
I hope you like it, please leave your comments below.
I am blogging very late tonight as our internet was not working so I started this post at midnight!
Right I am off bed, goodnight my lovelies.
Huge Hugs
Sandra xxxx

Thursday 15 January 2015

Fabulous Lyra

Good Morning Ladies,
This card has been half made for some time, sat on my desk, I was undecided about it.
so I made myself sit and finish it somehow, I was all set for putting the sentiment where the flowers
are and the flowers up the top, but I had already done that with the teal card before Christmas.
Anyway here goes, I used Pat's Lyra Die by Creative Expressions and cut a piece of red card, I matted it onto a piece of white card, (this is where I had left it). I then decided that I would put a piece of White vintage seam binding across the top of the card and stick a pearl flower string across it
using Cosmic Shimmer PVA Glue, I then tied a 'messy bow' out of the same seam binding and attached it to the card with a glue dot, I popped one of the pearls flowers from the string into the centre of the bow to finish it off.
I stamped my sentiment onto white card and die cut it with the tag from the French Collection Border, Corner &Tag Set by Creative Expressions, and mounted it underneath the bow with foam tape, I always add a little Cosmic Shimmer Glue as well to make sure it stays put, it also helps if you don't get it in the right place first time.
For the floral element I used my favourite Impression Obsession foliage dies and a few colour stems from the flower sprays that Anna Marie Designs sells, the little flowers where cut from the same card as the main red piece using a mini flower die from Impression Obsession once again. I fiddled about with the arrangement until I was happy, it is stuck together with Pinflair Gel.
I hope you like it, I would love to hear your comments and stories below, its great to hear how your day has been.
Mine has been fairly uneventful, had a friend pop in for coffee this afternoon which broke the day up nicely, I didn't get much crafting done though, in fact I left my craft room in somewhat of mess as I decided late on yesterday to sort all of my paper flowers, leaves and stamens etc into colours and put them in separate tins, all good in theory until I discovered how many I had, thank goodness for the amount of tins of chocolates we consumed as a family this Christmas, those roses, heroes and celebrations tins have come in very handy!
Lynda I think I need your organisation skills, can you pop round!!!!!
Crafty Hugs to all of you lovely friends,
Sandra xxxxx

Wednesday 14 January 2015

Vintage Wednesday

Good Morning ladies,
Today's card was inspired by the flowers initially, I was looking through my box of roses and came across a different shade of pink.rose, it was more of a vintage pink, so I thought I would trawl through the ton of card stock in my craft room and find a shade that complimented, I decided on a well I am not sure how you would describe it really, more of a purply-pink, a blue-pink rather than red-pink, if you know what I mean! I then thought I would go for an off white/very pale cream accent card, anyway after that long winded description here goes.....
I cut my vintage pink card to Matt onto my 7x7 card base, then ran it through the Grand Calibur with the Eternity Embossing Folder from Creative Expressions, designed my our amazing friend Sue Wilson, this time however I used my blue/grey plate instead of the pink plate with the red adapter
plate for embossing folders, the result as you may see in one of the close ups is that the extra pressure
Gave a distressed look to the card, with it being a 'Coredinations' piece of card it gave the same effect as sanding it, purely by accident, but I have to say I loved the effect and it added to the 'vintage' feel
of the card. I stuck thus to the base card with Cosmic Shimmer Glue, I then cut two sizes of the Spellbinders Floral Oval dies (one of my all time favourite Spellbinder die sets), out of the vintage pink colour card and the larger one out of the off-white colour and the a Spellbinder basic oval die cut out of the off white too.
I stuck a piece of off white (can't remember name of colour) Vintage Seam Binding ribbon from Creative Expressions, across the centre of my card and put a detailed pearl strip across the ribbon for extra detail. I then stuck the first (large ) oval in the centre of the card and stuck it down using several laters of foam tape/pads for height and dimension, I previously had sat and die cut loads and loads of  foliage using a few different dies from Impression Obsession, they have a fab range of little fern dies that give great detail.
I used the foliage I had cut and the roses and arranged them to curve around the oval
Hint: I always arrange the flowers/foliage without any glue, so that I can get the right composition.
I used Pinflair Glue Gel ( Sorry Steph) to stick them as this also gives you a little extra wiggle room.
I Stamped the sentiment onto off -white oval. Matted that onto the Vintage Pink Floral Oval and then used foam tape to stick to the larger oval.  I finished the card by using some more of the seem binding to tie a 'messy bow' and topped it with a little pink flower and a bit of foliage.
I also added a section of Creative Expressions Pearl
 Swirls both top left and bottom right of the centrepiece, they are a little difficult to see on here but they just add that finishing touch.
Oh and a couple of stick pins, just standard ones this time though!
I would love to hear your comments, they really do make my day, especially days like today and

yesterday when I was feeling really low, those messages really did help me through the day, so please accept my thanks, it's genuinely heartfelt, they may only be words to some, but to me they are a life line.
We are kind of 'back to normal' tonight, yay! Someone else can take the responsibility of looking after the kittens etc. Mind you as soon as Paul got in the door he was bombarded with different requests, he ended up being home about half hour before he was back out with our eldest daughter Becca as she is learning to drive.
Well I am wondering if we will see snow tonight as forecast, fingers crossed, I love it, although I know it's not particularly practical it's so pretty and fun for the children, Matt (my son) has list his enthusiasm for it though as he said that if it lays on the ground he has yo be up at four a.m. To clear snow at Oxford airport!
Well that's me off for a shower ladies, I look forward to your stories tomorrow, take care and wrap up
warm, or be like me and stay indoors!
Warm Hugs to you all,
Sandra xxxxxx

Tuesday 13 January 2015

Black & Gold Tuesday

Good morning lovely ladies,
Today's card is a nod to the 'channel card',
I started by glueing a piece of Pale gold shimmer card to my 8x8 black base card.
I then cut a piece of black card, to just smaller than the gold card and ran it through the Grand Calibur with the French Collection Border die, I put the remaining large part of the black card through the eternity emboss folder, I love this pattern! I then cut the next 'decorative' layer out of black card, finishing off with a layer of gold shimmer card to match the base colours. I stamped "thinking of you" as the sentiment. I added a piece of gold silky crush ribbon across the card, finishing off with a double bow in black and soft gold and a couple of stick pins! Close up below......


Close up of sentiment!
Close up of bow and sticks pins!


Hope you are all well, hugs, Sandra x
Please leave you comments below, thank you!

Monday 12 January 2015

Thank you, flowers


Good Monday Morning Ladies,
Well, Paul has actually gone away today, so I am going to try and keep busy today, although to be
honest I feel a little under the weather, not sure it's the stress of the messing about with Paul going, then not going etc, or the fact that when we took Bella back to the vet they said that it looks like she has been licking her wound and that it looked a little red and sore, they gave her some long acting antibiotics, they also gave us a smaller 'cone' thing is she is so small she slides out of the darn thing anyway, I tried to tie a bandage on her today but no that was straight off too! There is always something to be worrying about!
Today's card....I have been wanting to rrecreate one of these cards since the very day I saw it on Sue's blog, so simple, yet so effective! I just matted to pieces of white card together, one very slightly larger than the other. I left a larger border, just under half inch all round then matted onto another piece of white card, then another tiny border of red, (always remember to 'gut' your card stock this means cutting out most of the inside of the card so that you don't waste the card, you won't see it behind the other card layers anyway) I then popped it onto a plain white card base,
The focal element of the card is simple, I cut two of the Grand Vinery Dies in green card, stuck them
to the card with cosmic shimmer, ( I put a blod of cosmic shimmer Pva on the back of my hand and
then just tap the die cut on the glue, that way you have no glue splodging out from under your die cut), one vertical and then one off at a slight angle but with the bottoms meeting in the bottom right corner.  I stamped 'thank you' sentiment at the top right of the card.  I then added red roses over the foliage die, just wherever you think they need to be put!
I cut and Itty Bitty bow out of matching red card and the downward pointing tails and popped this onto the card where the stems of the two Grand Vinery dies.
Quite simple, but I like it I think.
Let me know your thoughts below please.
My eagle eyes picked out a new die cutting machine by Spellbinders on a recent FB photo, when I enquired they said it is called 'Platinum', more details to follow, it looks quite big, it has drop down flaps either side, providing what looks like bigger than A4 cutting area, it looks quite heavy too, the pictures looked deceptive, I am sure I saw.  A handle, but someone else said she thought it was electric, either way let's hope it's an improvement on the Calibur, although I am left wondering why they relaunched the Grand calibur in a different colour!
Sue's new die cutting machine seems really good, very sturdy, she seems to be getting used to it now and is enjoying using it.  Pat eventually got her New machine, strangely it's lighter than the old Calibur, which seems odd as they are supposed to have replaced the plastic bits with metal, but we will see how it goes over the coming months.
Well I must go and check on Bella's, make sure she is not licking where she shouldn't,
Have a great week my lovely friends,
Crafty Hugs
Sandra xxxx
Close up of roses below....


Sunday 11 January 2015

Post No. 2 Sophie's Dinosaur


.
Hello Again,
Here is the picture that Sophie drew 
Yesterday, totally freehand,
Isn't she amazing!
Very proud mum,
Hugs
Sandra 
Xxxxxxx

Fabulous Sunday!

Good Sunday morning Ladies,
Today's card is a mixture of Scandinavian dies and lovely Lyra of course, both dies sets from Creative Expressions, designed by our lovely Sue Wilson.
I actually don't own the lovely Lyra die, I used Sue (Mrs B's) die when we got together on
Wednesday.
I uses it to cut the top and bottom of a piece of what I would describe as a dark plum colour card,
I put a piece of cream card underneath, which covered my 8x 8 white card base, although I did grim a little off the bottom of the card before I Matt and layered.  Next I cut the largest layer of the Copenhagen dies in the Scandinavian range, I then cut the decorative layer in the plum card,  I stamped the sentiment onto the cream card using Seedless Preserves Distress ink that matched really well, I cut it out using the Stockholm centre piece, these dies mix and match so well!
I made three roses using the Classic Rose Dies by Creative Expressions, and mixed them with some paper roses from my stash, I mounted them on top of two of the Ivy die cuts again By CE,
I popped a little butterfly in the top corner with a pearl swirl trail.
Let me know what you think,  I love reading your thoughts and comments.
I will be doing another little post today, my youngest daughter Sophie ( younger by a whole hour and half) is doing GCSE Art and she drew a picture of a dinosaur yesterday, she would like you all to see it, Although it isn't strictly a card I think we can get away with it.
Hugs Ladies
Sandra xxxxx


Saturday 10 January 2015

Pretty Blue Shoe!

Good Morning Ladies,
Sorry a little bit late but the schedule time was incorrect! I hope you all still get to see it x
I have had this Anna Marie Designs Shoe Stamp for some time, I decided today is the day I will use it, so here goes.....
I took a piece of Coconut white card and stamped the shoe in the bottom corner and coloured the image with Promarkers Denim Blue and Pear Green.  I trimmed the card to approximately 7 x 6 in.
I drew a faint line around the card with a fine liner pen and mounted onto a piece of Ballet Blue spotty card from Anna Marie Designs, I then roughed the edges with the blade of my scissors, and put mounting foam on the back and added it to the base card which has a piece of Ballet Blue dotty card and a tiny border of white card. 
I chose to embellish the shoe with flowers made from using Creative Expressions Camelia Die, which I cut 2-3 times for each flower, I stuck them down with Cosmic Shimmer Glue, and added
pearls to the centres.  I added a Diamond Laser cut sheet from Anna Marie Designs and trimmed it around the shoe, I have been wanting to get my hands on these for months, I love the effect they give and they break up the background, I will stamp the relationship of the recipient in the lattice background (my Mum. My Daughter, Niece etc).  I cut a couple of swirly dies out and added them to the background and tied a ribbon into a bow and put it in the top left hand corner, with the swirly bits underneath and added some flowers made using Creative Expressions Camelia Die and  made the bed etc. I topped it with a couple of leaves and the flower made from the dotty background card, a few flowers (roses) added some length the border and some little beaded stamens also from AMD , I will add the sentiment to the card when I know who it is for.
Well what do you think?
My biggest fan/critic says I make too many blue cards (blue colour not blue humour)! lol
so I will make an effort to use more colours in future!
I hope you all have a fun weekend, we are off to vets for Bella's first check up this morning.
I hope you are all  safe from this terrible wind, its howling out there tonight!
Crafty hugs to all of you,
Sandra xxxxx
A few close ups below........