Saturday, 23 January 2016

mixed Craft Saturday

 Maria's amazing Cross Stitch
My handmade padded pinboard

Sophie's Lizard GCSE artwork
Her inspiration picture


Good Morning Ladies,
Welcome to what will be the last Mixed Craft Saturday, I have no more crafts to share with all of you and I don't want to come across as a nag by pestering you for photos!

So today's crafts are as follows....
First up we have another amazing Cross Stitch designed and created by Our Maria, I love this cheeky looking Santa, with his rosey cheeks, the cute little kitten and bird beside him are just so adorable too, I think its amazing how you can capture their rosey cheeks and expression with stitches!! Very talented!!
Thank you Maria xxx

Second up we have had to resort to showing things that I have made, this was made using a cork pin board, covered with wadding and then the fabric, I used a stapler to attach the fabric,I then criss crossed the ribbon over the board and studded the buttons into the board, giving the padded look!
I chose this pretty material to go in my daughters bedroom. She filled it with 
Photos,  cards and precious memories!

Last but by no means least today we have Sophie's GCSE arftwork, this piece is a Lizard, if you zoom into the picture you can see the detail she has managed to get in the eye, I am so proud of all of Sophie's work, she works hard at reach piece which really shows I believe.  I am pleased she has decided to do A level Art. Well done Sophie xxx

Have a lovely day ladies,
Love and hugs
Sandra xxxx

Friday, 22 January 2016

Some brighter colours with same die as yesterday

 Michele's intertwining Circles card 
Michele's 2nd Intertwining Circles card

Good Morning ladies,

I thought I would show the same die as yesterday but in brighter colours, that may appeal to you all more,  both of these fabulous cards have been made by our Michele, I love the beautiful blue colour you have used on the 2nd card Michele, the die shape makes it look unlike bubbles on the surface of a crisp clear Mediterranean Sea, oh I wish I was on that beach right now!
Thank you so much for sending in the cards for me to share with everyone Michele xxx

We ventured out to The Range yesterday as I needed to get an emergency replacement for my Tonic Guillotine, I have no idea how the blade has warped on the cutting arm, but it has, Paul has tried to tighten it, but it hasn't worked, when you look down onto it you can see where the blade is flush with the metal plate at the top, them bows out and in again at the bottom, so every piece of card I cut isn't straight which is so frustrating, so I did some research and the Xcut trimmer had a good feedback, The Range had it on offer so we went to pick one
Up today, so far so good, one bonus is that it has a lifetime guarantee!

I can't believe that the weekend is upon us again, it doesn't seem five minutes since our nightmare journey home from. Essex.

Whatever you are doing have a good day,
Love and hugs
Sandra
Xxxxx

Thursday, 21 January 2016

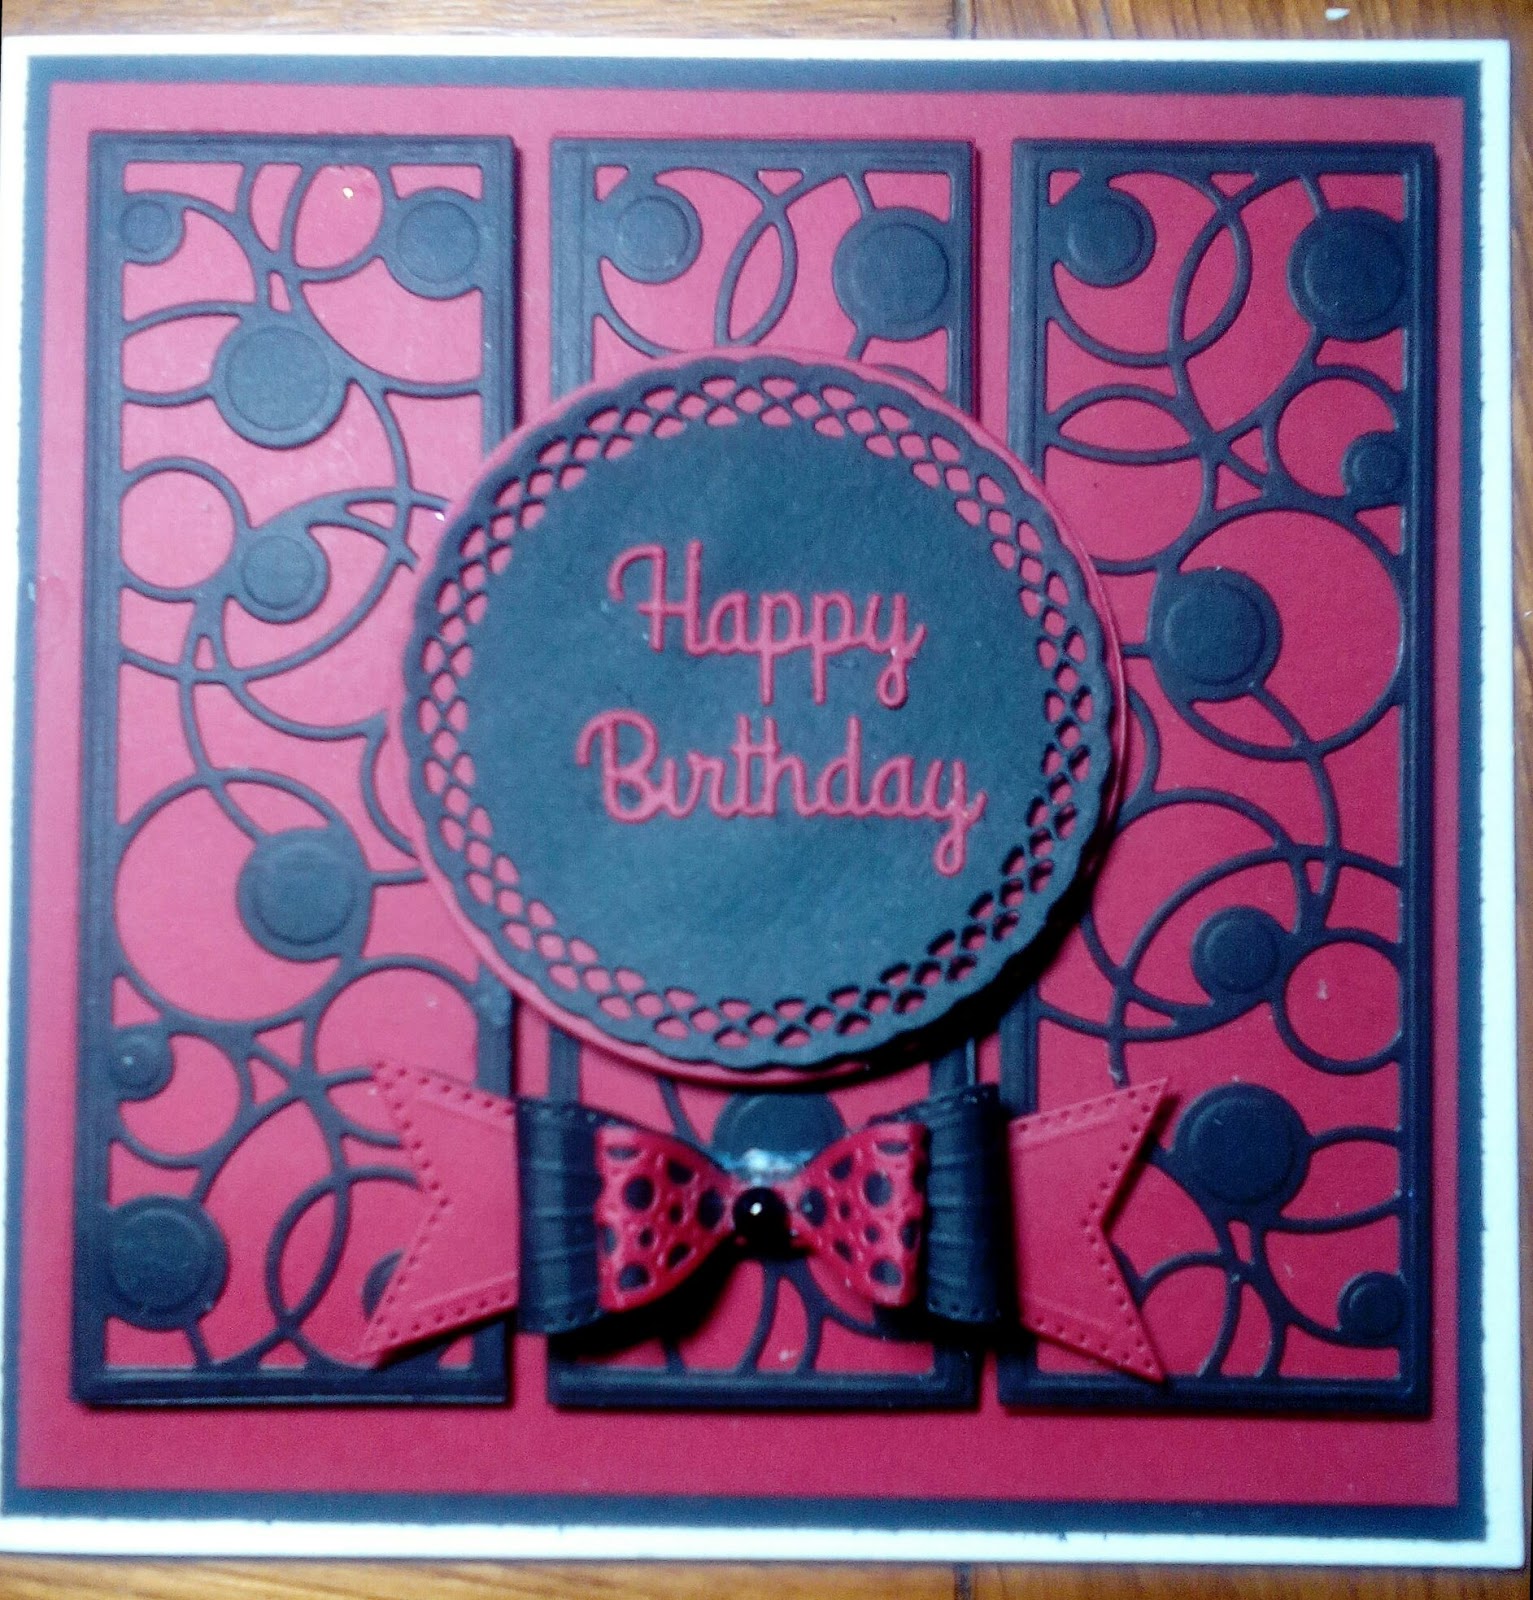
A different version of this weeks challenge to inspire you !

Good Morning Ladies,

I was wanting to try out one oif my latest dies, so I thought I would use it to make a challenge style card, booth for fun and to give those of you that might be undecided another idea.

The die is the Creative Expressions Intertwining Circles die, from the Mini Striplet range,I was insured of it at first as I got it in a bundle from Hochanda, but after playing with out today I quite like it!
I die cut the complete die setbin black for the top piece and then just die cut the outside edge to make the red layer underneath!, I then placed three of these on some red card and added a black layer and then popped it onto a white card base, I then cut the centre circle fromon the Tonic Trellis circle die set and added my sentiment cut in red card.
To finish I added the smaller of the two Classic Bow dies, added a spotted bow die cut on top and added the bottom 'forked' tail pieces from the bow die set!

I Hope you like this more Masculine feel card,

Have a great day,
Love and hugs,
Sandra xxxxx

Wednesday, 20 January 2016

A Simple Tutorial

 Notelets and Matching Box
(The tutorial is for the little box)


Take a piece of card, plain or patterned and 
cut down to 9 1/2 inch  by  7 1/2 inch
(or 25 1/2 cm by 21cm)


place the card on your score board (the longest side along the top) and score down at 3 1/2, 4 1/2, 8 and 9 inches


Rotate your card so that the short side is at the top and score down at 1, 2,  5 1/2 and 6 1/2 inches


This is what you should end up with, ( i have highlighted the score lines with pen to make them stand out.
Score all of your folds really well.


Now comes the tricky bit to explain.....
you will be cutting away all of the pieces of the card shown in red, which seems quite a lot, but it all makes sense when you have it in front of you.
The little bits that are highlighted in black are where you cut little 'notches' out like you do when you are making a box, this is to make the little flaps that close the box.


This is what you should end up with, a funny, almost 'T' shape, at this point I rounded the edges of the box on the wide end and cut a little semi circle in one side of the middle section of the box.


If you look at the photo above you will notice that there is a narrow flap at the right side end of the card, you will need to add glue to the back of this and fold it over to meet up with the other side of the box....see below


I used Cosmic Shimmer glue as it dries quite quickly and you do get a little 'wiggle room' !!


As you can see here the flap fits neatly in place, leaving a good strong bond.
At this point the boxes can be folded flat for storage, just open all flaps and push down!


Here is the finished box, you can see where I used a circle Punch to make a little place to grab the flap to open the box.
I hope you like the idea.


These are the
 four little notelets that I made along with their envelopes to fit into the matching bow.
 The cards and box were decorated by taking a
a 6 1/2 inch  by 3 1/4 inch piece of card, fold in half and score and then I stamped with a script background stamp using Lilac, Pale blue, green and orange ink, I then cut the 3 Justrite Aster die cuts in each colour, using the smallest one (i think) and I then shaped them and stacked then together, off setting each to the next, to give a fuller looking flower, I made all 4 of the notelets from plain white card and used the same ink as the script in stamped in, I then added a small section of the Flourish die cuts by Cheery Lynn to add some interest and foliage to the card and then added a matching green pearl in the centre of each flower and tied a matching bow on the stem of the flourish.

The finished set !

Now I think that these little cards would be perfect to keep in the drawer to sent at a moments notice to someone you are thinking about or to say sorry or get well soon.

I had fun making these fun little cards and box, I hope you will too.

Pat and Sue are coming today, so fun to be had in this house tomorrow!

Johanna, could you please email me your address please.

Love and hugs to all
Sandra
xxxxxx


Tuesday, 19 January 2016


Brenda's Beautiful card for Pat

Good Morning Ladies,

How are those challenge cards coming along???  Pat & Sue, come on I would like to see one from you this week!!

How lovely is this card that Brenda L, has made for Pat's birthday?! I love the colours you have chosenhighlight for once You have beaten me, I don't know what the frame die is you have used, I like it very much though!
Once again your flower spray is just stunning!
I will also highlight a TIP: for Vellum, printing your sentiments onto them, it works beautifully, such as delicate alternative to tags.
Thank you for sharing this beautiful card with us Brenda xxxx

I hope that you all have a lovely day, 

Love and hugs,
Sandra xxx


Monday, 18 January 2016

Monday challenge


This week's Sketch

My Sketch challenge Card

Good Monday Morning Ladies,

It's that time of the week again, time to get your creative head on (for those of you that haven't crafting all weekend)! 
I hope that this one isn't too challenging for everyone. 
I have used Creative Expressions Striplet dies, you could use strips of patterned paper instead, or anything you choose.
I did discover that I don't really have any nice circle/round dies, apart from basics, so I might look getting some pretty circle dies, I wish there was a circle equivalent of the Spellbinder Floral Ovals (they are one of my favourite dies that I have to force myself not to use)!!
The card I have used as you might haves guessed is Anne Marie Designs Card.

I really can't wait to see what you all come up with this week ladies, thank you all for taking part last week.
That's all from me today, I will call in later to see what you are all up to!
Love and hugs
Sandra
Xxxxxxx

Sunday, 17 January 2016

Challenge Cards and Happy Birthday Pat

 Happy Birthday to My Dear Friend Pat 
 XXX Lots of Love XXX

The Sketch 

My Sketch Card

Maria's Challenge card

 Janet's Challenge card
Maria's Challenge 2
 Anne's Challenge card

 Jean's Challenge card

 Lynda's Challenge Card

 Jess's Challenge Card

 Michele's Challenge Card

Brenda Lello Challenge Card

Lilian challenge card


Maureen's Challenge card


Good Morning Ladies,

First up I would like to wish my dear friend Pat the very happiest of birthdays, sending you lots of love and a big birthday hug xxxx

I would like to once again thank each and everyone of you that has taken part in this weeks sketch challenge, as you can see we have an amazing array of cards that have been designed around the sketch I posted last Monday!
We have everything from funny birthday cards (I loved that stamp Anne)! To an Easter card (our first one)! By Michele, I think I remember you saying you saw an Easter egg straight away!
I love to see that it encouraged some of you to look back through some of your older dies, I haven't used my California Collection for months, I think we do get caught up with the dies 'of the moment' and we sometimes forget to go back to the dies we once couldn't live without! I also love that some of you made two cards (I have kept some back for my rainy day cards) !

I hope you are enjoying the challenges, I am planning to feature some 'techniques' soon, so if there is anything you would like me to feature let me know, some of them I will be learning along with you!

Enjoy your Sunday everyone, thank you so much for your input !!
Love and hugs
Sandra
Xxxxxx